Concrete and Paver Surface Prep Before Sealing:
The Contractor’s Checklist
A great sealer starts with great surface preparation.
Even the best concrete or paver sealer can’t fix a dirty, wet, or damaged surface. Most sealer failures happen before the product ever leaves the bucket.
If you want better-looking jobs, fewer callbacks, and happier customers, take a few extra minutes to prepare the surface the right way.
Here is a simple checklist every contractor should follow before sealing concrete, pavers, or natural stone.
1. Read the Product Instructions
Every sealer is different.
Before opening the container, read the Product Data Sheet, Safety Data Sheet (SDS), and Applicator Guide. These documents tell you exactly how the product should be applied, how much coverage to expect, and what weather conditions are acceptable.
Find current data sheets and applicator guides on our Technical Data page.
Skipping this step can lead to costly mistakes.
2. Inspect the Surface
Walk the entire job before you begin.
Look for:
- Oil stains
- Rust stains
- Efflorescence (white mineral deposits)
- Mold or mildew
- Old failing sealer
- Loose pavers
- Cracks
- Missing joint sand
If problems are found, fix them before sealing.
Remember, sealer protects the surface—it doesn’t repair it.
3. Make Sure the Surface Is Clean
Sealer locks in whatever is underneath it.
That means dirt, algae, leaves, stains, and debris should all be removed first.
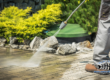
Pressure washing is usually the first step, but some jobs may also require specialty cleaners or a sealer stripper if an old coating is failing.
Always allow enough drying time after cleaning.
4. Check for Moisture
One of the biggest mistakes contractors make is sealing a surface that still contains moisture.
Moisture trapped beneath a coating can cause:
- Whitening
- Blushing
- Poor adhesion
- Peeling
- Premature failure
If you’re unsure whether the surface is dry enough, wait longer.
When in doubt, don’t seal.
5. Watch the Weather
The weather matters just as much as the product.
Before sealing, check for:
- Rain in the forecast
- Heavy morning dew
- High humidity
- Freezing temperatures
- Extremely hot surfaces
Fresh sealer needs time to cure. Rain too soon after application can sometimes cause whitening or extend the drying time.
6. Protect the Work Area
Take time to protect everything around the project.
Ask customers to move:
- Patio furniture
- Planters
- Trash cans
- Vehicles
- Outdoor rugs
Trim plants that hang over the work area so the surface can be cleaned and sealed evenly. Nearby plants may be protected, but accidental contact with sealer can leave a shiny appearance on the leaves.
Plants, planters and furniture within about 5 feet of the surface should be moved and kept away for at least 24–48 hours after sealing. Plants that touch the surface can be shielded; overspray won’t kill them but can leave leaves shiny.
7. Turn Off Irrigation
This step is often forgotten.
Sprinklers should be turned off before work begins and remain off for at least 48 hours after sealing.
Extra water can interfere with curing and affect the final finish.
8. Think Beyond the Surface
Professional contractors also prepare the surrounding area.
Check that:
- Doors and windows are properly sealed before pressure washing.
- Pool pumps are running during cleaning unless the project involves stripping an old coating.
- Lawn maintenance and pool service companies stay off the surface until the sealer has fully cured.
- Garage doors and gates can be opened if access is needed.
- Place towels where water could get in around doors and windows during pressure washing.
- Older or poor-quality paint may chip during pressure cleaning, so point it out to the customer beforehand.
- When stripping, pool pumps should be off. Stripping some old sealers can release zinc that may turn pool water green, so warn pool owners.
- Mulch and leaves in nearby beds can be displaced; the customer may need to re-mulch.
- If no one will be home, ask the customer to leave the garage door cracked so it can be tended.
These small details help prevent delays and unhappy customers.
9. Set Customer Expectations
Communication is just as important as preparation.
Before starting, explain when customers can safely use their surface again.
Typical recommendations include:
- Foot traffic: usually within 24 hours, once the surface is no longer tacky.
- Furniture and trash cans: keep off for 48 hours.
- Vehicles: wait 3 days; if the surface is still tacky, wait one more day.
- Outdoor rugs: wait at least 4 weeks.
- Sprinklers off before work and for 48 hours after; lawn and pool crews should wait at least 48 hours.
- Rain after sealing can cause temporary whitening. This usually isn’t cause for alarm, but it may extend dry time.
- Every substrate is different, and results may vary.
Always follow the cure times listed for the specific Deco Products sealer being used.
10. Document Everything
Take before-and-after photos.
Keep notes about:
- Weather conditions
- Surface temperature
- Moisture conditions
- Products used
- Coverage rates
Good documentation protects both you and your customer while helping you troubleshoot future projects if needed.
Check the Product Limits
- Most Deco penetrating sealers (Deco 20 Clear Finish, Salt Shield 303) must be applied at 28°F and rising. Don’t apply them on colored concrete, glazed tile, slate, glazed brick, acrylics or painted finishes.
- Salt Shield 303: new concrete must be at least 28 days old. Don’t apply if it has rained in the last 8–12 hours.
- Both products etch glass. Cover glass, and clean any overspray immediately.
Deco 20 Clear Finish · Salt Shield 303 · find your local Deco representative
Preparation Creates Professional Results
Every contractor wants a finish that lasts.
The difference between an average sealing job and an exceptional one usually comes down to preparation.
By inspecting the surface, communicating with your customer, protecting the surrounding area, and following the manufacturer’s instructions, you’ll reduce callbacks, improve durability, and deliver better-looking projects every time.
At Deco Products, we believe education is just as important as great products. That’s why we provide contractors with professional training, technical support, and application resources to help every project succeed.
When you prepare the surface correctly, you’re already halfway to a successful sealing job.